Replace the print cartridges
When the ink level for the print cartridge is low, a message appears on the color
graphics display.
Note
You can also check the ink levels by using the HP Director that came with the
HP Image Zone software on your computer. For more information, see
Check
the estimated ink levels
.
When you receive a low-ink warning message on the color graphics display, make sure
you have a replacement print cartridge available. You should also replace the print
cartridges when you see faded text or if you experience print quality issues related to
the print cartridges.
Tip
You can also use these instructions to replace the black print cartridge with a
photo or gray photo print cartridge for printing high-quality color or black-and-white
photos.
To find out the reorder number for all the print cartridges that your HP all-in-one
supports, see
Order print cartridges
. To order print cartridges for your HP all-in-one, go
to
www.hp.com
. If prompted, choose your country/region, follow the prompts to select
your product, and then click one of the shopping links on the page.
To replace the print cartridges
1
Make sure the HP all-in-one is on.
Warning
If the HP all-in-one is off when you lift the print-carriage access
door to access the print cartridges, the HP all-in-one will not release the
cartridges for changing. You might damage the HP all-in-one if the print
cartridges are not docked safely on the right side when you try to remove
them.
2
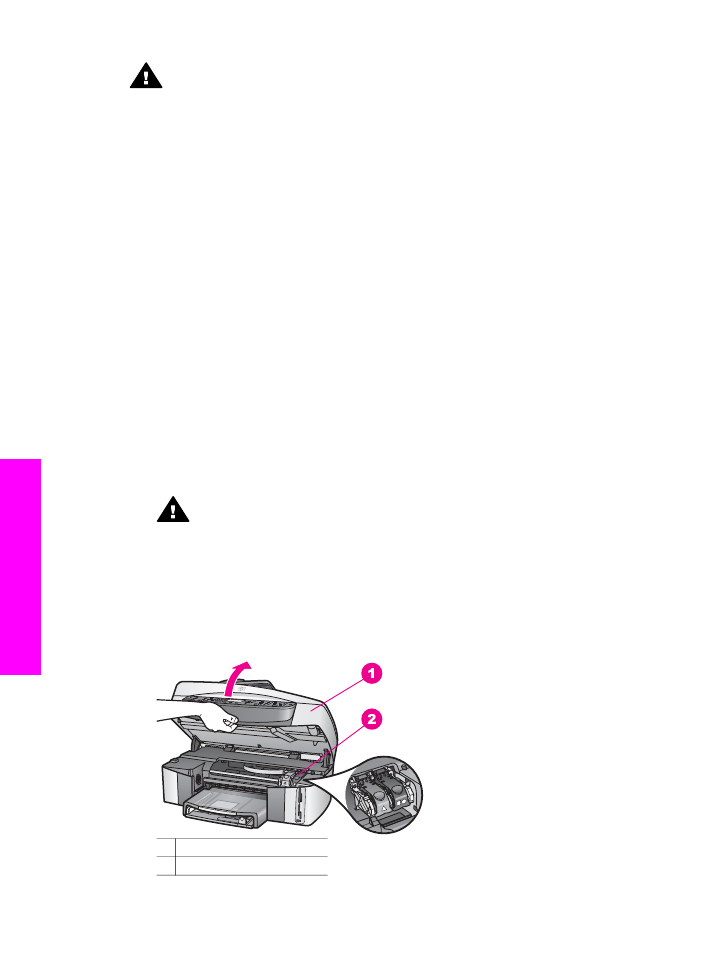
Open the print-carriage access door by lifting from the front center of the device,
until the door locks into place.
The print carriage is on the far right side of the HP all-in-one.
1 Print-carriage access door
2 Print carriage
Chapter 15
156
HP Officejet 7300/7400 series all-in-one
Maintain your
HP
all-in-one
3
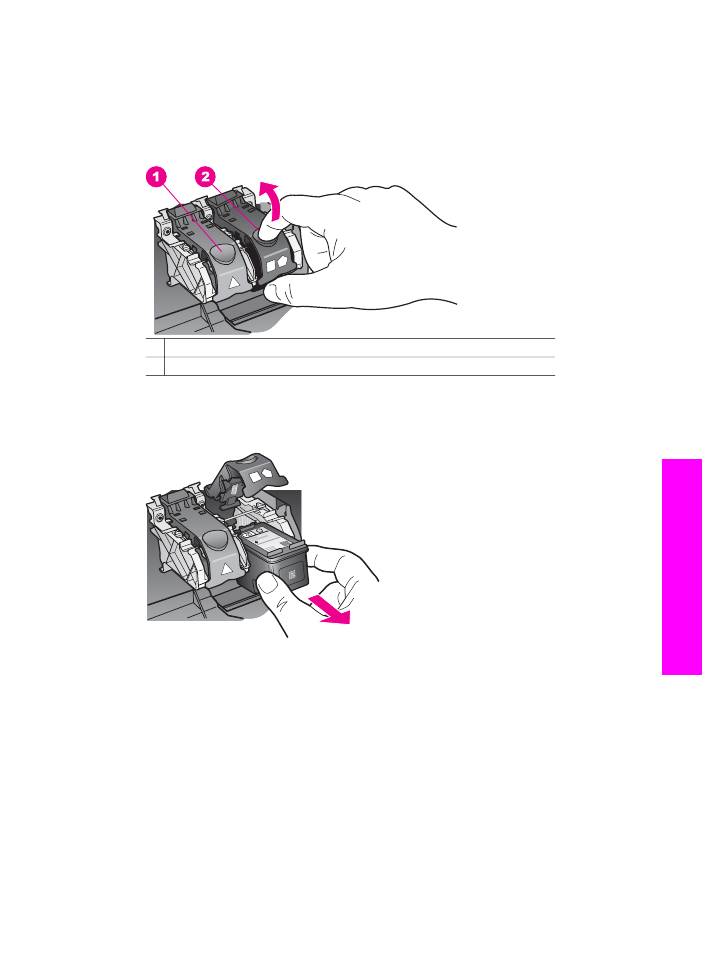
When the print carriage is idle and silent, press down and then lift a latch inside the
HP all-in-one.
If you are replacing the tri-color print cartridge, lift the green latch on the left.
If you are replacing the black, photo, or gray photo print cartridge, lift the black latch
on the right.
1 Print cartridge latch for the tri-color print cartridge
2 Print cartridge latch for the black, photo, and gray photo print cartridges
4
Push down on the print cartridge to release it, and then pull it toward you out of its
slot.
5
If you are removing the black print cartridge in order to install the photo or gray
photo print cartridge, store the black print cartridge in the print cartridge protector.
For more information, see
Use the print cartridge protector
.
If you are removing the print cartridge because it is low or out of ink, recycle the
print cartridge. The HP Inkjet Supplies Recycling Program is available in many
countries/regions, and lets you recycle used print cartridges free of charge. For
more information, go to the following website:
www.hp.com/hpinfo/globalcitizenship/environment/recycle/inkjet.html
6
Remove the new print cartridge from its packaging and, being careful to touch only
the black plastic, gently remove the plastic tape by using the pink pull tab.
User Guide
157
Maintain
your
HP all-in-one
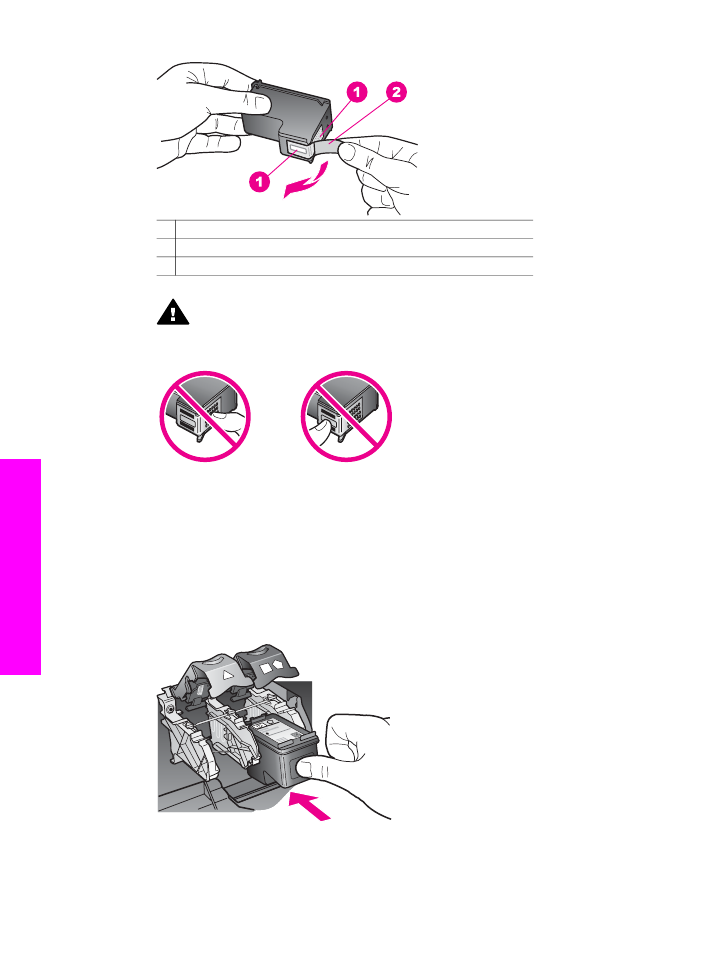
1 Copper-colored contacts
2 Plastic tape with pink pull tab (must be removed before installing)
3 Ink nozzles under tape
Caution
Do not touch the copper-colored contacts or ink nozzles.
Touching these parts can result in clogs, ink failure, and bad electrical
connections.
7
Slide the new print cartridge down the ramp and into the empty slot. Push the print
cartridge forward until it clicks into place.
If the print cartridge you are installing has a white triangle on its label, slide the
print cartridge into the slot on the left. The latch is green with a solid white triangle
on it.
If the print cartridge you are installing has a white square or a white pentagon on its
label, slide the print cartridge into the slot on the right. The latch is black with a solid
white square and a solid white pentagon on it.
8
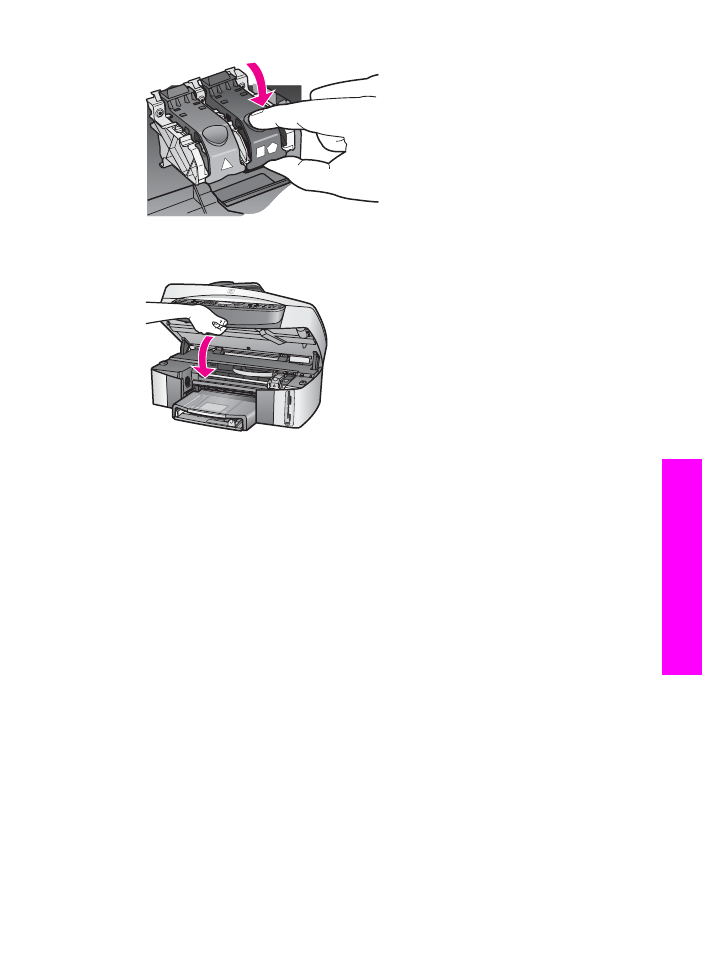
Press down on the latch until it stops. Make sure the latch catches below the bottom
tabs.
Chapter 15
158
HP Officejet 7300/7400 series all-in-one
Maintain your
HP
all-in-one
9
Close the print-carriage access door.