
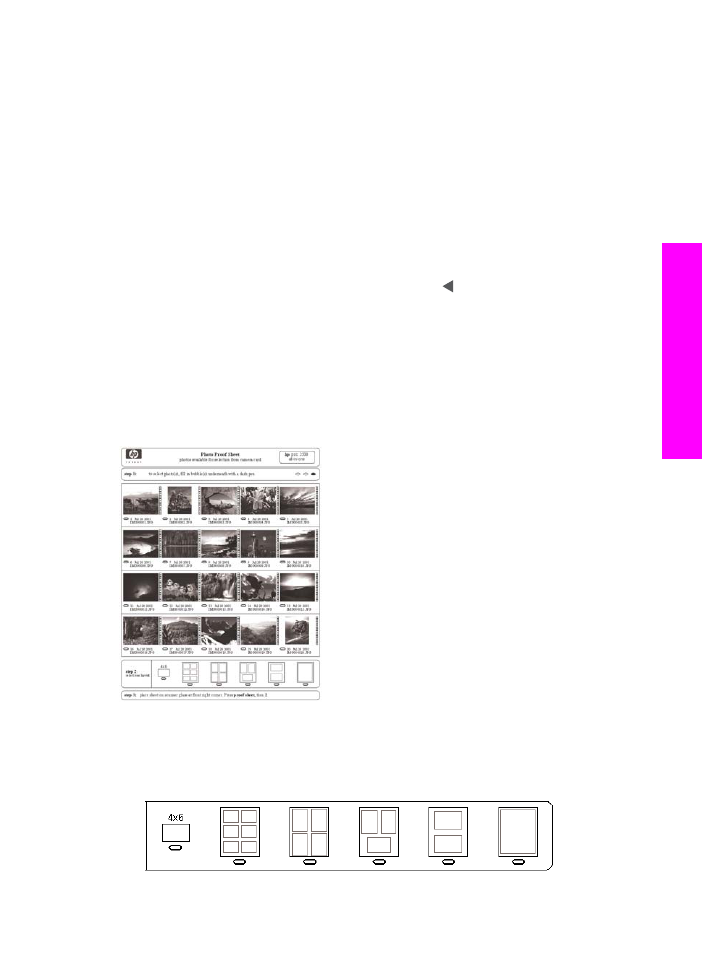
Print a proof sheet
The first step in using a proof sheet is to print it from the HP all-in-one.
1
Insert the memory card into the appropriate slot on your HP all-in-one.
2
In the Photo area, press
Proof Sheet
, and then press
1
.
This displays the
Proof Sheet Menu
and then selects
Print Proof Sheet
.
Note
Depending on how many photos are on the memory card, the time it takes to
print a proof sheet can vary greatly.
Chapter 6
42
HP Officejet 7300/7400 series all-in-one
Memory
Card
and
PictBridge
3
If there are more than 20 photos on the card, the
Select Photos Menu
appears.
Press the number next to the command you want to select:
–
1. All
–
2. Last 20
–
3. Custom Range
Note
Use the proof sheet index number to select which photos to print for a
custom range. This number might be different from the number associated
with the photo on your digital camera. If you add or delete photos from your
memory card, reprint the proof sheet to see accurate index numbers.
4
If you choose
Custom Range
, enter the photo index numbers for the first and last
photos you want to print.
Note
You can erase index numbers by pressing to backspace.